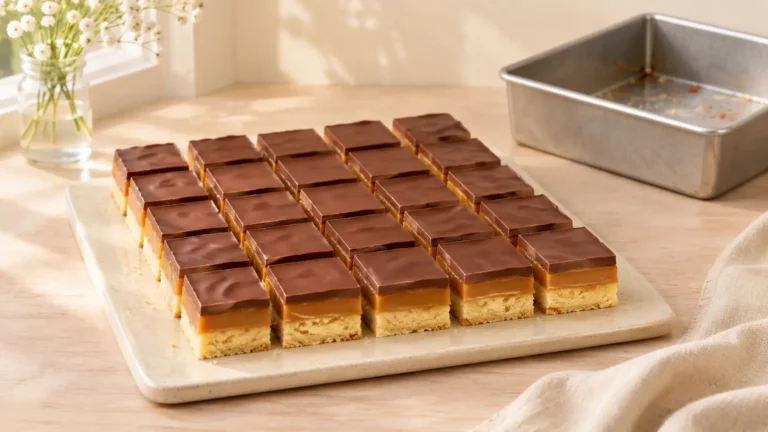
Hi, I’m Sophie Bennett. I’m happy you’re here to make fudgy one-bowl brownies with me. I love a dessert with a clear method and a little room for your own finishing touch. Today we’re aiming for dense chocolate centers, a thin glossy top, and chewy edges, with each stage laid out so you can work at a comfortable pace.
This recipe makes 16 squares. Read through the directions first, set out the 8-inch square metal pan, and plan for the resting time before you begin. That small bit of preparation makes it easier to enjoy the process and serve the dessert at its best.
Why This Recipe Is Awesome
The appeal is dense chocolate centers, a thin glossy top, and chewy edges. Butter and melted chocolate form a rich base before cocoa deepens the flavor. The small amount of flour supports a dense center, so extra flour or a long bake would change the intended texture. Cooling in the pan is what turns the soft slab into sliceable squares.
Ingredients You’ll Need
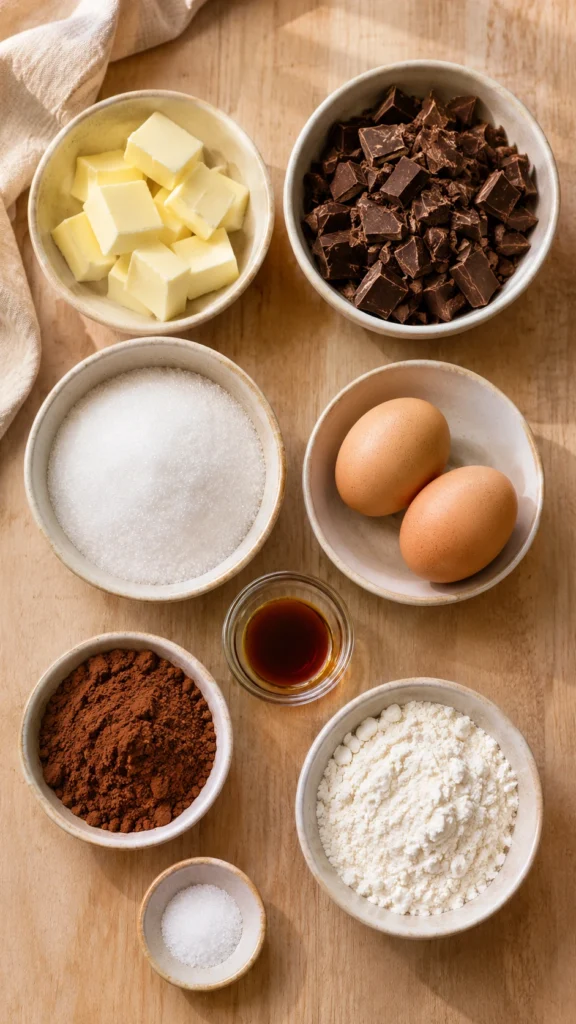
The recipe card gives the complete quantities for every component. These ingredient notes explain a few details that make the method easier to follow.
- Cocoa brings concentrated chocolate flavor. Break up lumps before mixing so dry pockets do not remain in the finished dessert.
- Chocolate supplies both flavor and body. If melting it, use gentle heat and keep stray water out of the bowl.
- Flour supplies structure; spoon and level it, or use the gram weight so the mixture does not become unnecessarily dry.
- Butter contributes flavor and texture. Use it cold, softened, or melted exactly where specified; those states perform different jobs.
Tools & Accessories for This Recipe
Choose equipment that suits the recipe size and your workspace. These basic tools help with measuring, mixing, and handling the finished dessert.
Affiliate links: qualifying purchases through these links may earn a commission.
- 8-inch square metal pan — the specified size and shape for this batch. Find on Amazon
- Digital Kitchen Scale — measuring the base and filling ingredients consistently. Find on Amazon
- Mixing Bowls — keeping the recipe components separate until assembly. Find on Amazon
- Silicone Spatula — reaching the corners of the bowl and leveling the mixture. Find on Amazon
- Parchment Paper — making a sling when the recipe calls for one. Find on Amazon
- Sharp Kitchen Knife — cutting cooled bars neatly and evenly for serving. Find on Amazon
Step-by-Step Instructions
- Heat the oven to 350°F (175°C). Line the pan with parchment, leaving handles above two opposite sides, and lightly grease the paper.
- Melt butter and chopped chocolate together in a microwave-safe bowl in 20-second bursts, stirring between each. Let cool for 5 minutes.
- Whisk in sugar, then eggs and vanilla. Whisk by hand for about 1 minute, until the mixture looks glossy and slightly thickened.
- Sift cocoa over the bowl, then add flour and salt. Fold gently with a spatula until no dry pockets remain.
- Spread batter evenly into the prepared pan, pushing it into the corners. Tap the pan once gently to release large trapped air pockets.
- Bake 25–30 minutes, until edges are set and a tester near the center shows moist crumbs, without liquid batter.
- Cool completely in the pan on a rack, about 90 minutes. The center firms as it cools, so avoid cutting while hot.
- Lift out using the parchment handles and cut into 16 squares. Wipe the knife between cuts to keep the fudgy edges neat.

Use a metal pan when specified, since it responds differently to oven heat than a thick glass dish. Set the pan on the center rack and keep the surrounding space clear for even heat circulation.
Common Mistakes to Avoid
- Use moist crumbs as the doneness cue; waiting for a completely dry tester can turn fudgy brownies cakey.
- An uneven layer can leave the center underdone while the edges overbake. Spread the mixture into the corners at the same thickness.
- Changing pan dimensions changes depth and timing. Use the listed pan for this batch and begin checking near the earlier time.
- Cutting while hot can tear the crumb or release loose filling. Wait until the recipe has cooled or chilled fully.
Alternatives & Substitutions
Fold in 1/2 cup chopped walnuts after the flour for a crunchy version, noting the added tree nuts.
Keep the main structure of the recipe intact when making this variation. Replacing flour, fat, eggs, or dairy can require a different formula rather than a direct swap.
Storage and Serving
Keep airtight at room temperature up to 3 days or refrigerate up to 5 days. Freeze wrapped squares for up to 2 months.
Ingredient check: this recipe includes wheat, milk, eggs. Review packaged ingredients for additional allergens and use clean equipment when preparing food for guests.
For similar portions, mark the center of each side before cutting the slab into a grid. Clean the knife between rows rather than pushing accumulated crumbs or filling into every subsequent cut.
FAQ
Can I make this ahead?
Keep airtight at room temperature up to 3 days or refrigerate up to 5 days. Prepare any fresh garnish close to serving so it keeps its color and texture.
Which pan or container should I use?
Use the 8-inch square metal pan as written. The depth controls how the mixture sets, so changing the dimensions means you also need to reassess the timing.
What is the most important texture tip?
Use moist crumbs as the doneness cue; waiting for a completely dry tester can turn fudgy brownies cakey.
Can I change the flavor?
Fold in 1/2 cup chopped walnuts after the flour for a crunchy version, noting the added tree nuts. Make one small change at a time so it is easier to judge the result.
How do I know it is ready to serve?
Follow the texture cues in the directions and allow the full resting period. A surface that looks ready does not always mean the center is firm enough to cut.
Can I halve or double the recipe?
For a first batch, use the quantities and pan listed. Scaling changes thickness, mixing, and timing; multiplying ingredients alone does not establish a new baking time.
Should the tester be perfectly clean?
For these fudgy brownies, a few moist crumbs are expected. Liquid batter means more baking is needed, but a completely dry tester may mean the center has gone past the desired texture.

Fudgy One-Bowl Brownies
Ingredients
Equipment
Method
- Heat the oven to 350°F (175°C). Line the pan with parchment, leaving handles above two opposite sides, and lightly grease the paper.
- Melt butter and chopped chocolate together in a microwave-safe bowl in 20-second bursts, stirring between each. Let cool for 5 minutes.
- Whisk in sugar, then eggs and vanilla. Whisk by hand for about 1 minute, until the mixture looks glossy and slightly thickened.
- Sift cocoa over the bowl, then add flour and salt. Fold gently with a spatula until no dry pockets remain.
- Spread batter evenly into the prepared pan, pushing it into the corners. Tap the pan once gently to release large trapped air pockets.
- Bake 25–30 minutes, until edges are set and a tester near the center shows moist crumbs, without liquid batter.
- Cool completely in the pan on a rack, about 90 minutes. The center firms as it cools, so avoid cutting while hot.
- Lift out using the parchment handles and cut into 16 squares. Wipe the knife between cuts to keep the fudgy edges neat.
Notes
- Yield: 16 squares
- Oven/heat: 350°F (175°C)
- Pan/container: 8-inch square metal pan
- Includes staged baking or stovetop work where applicable; use the texture cues in the method.
- Times are approximate: cook/bake 28 minutes (approximate); cooling/chilling/resting 1 hour 30 minutes (approximate; see method); total 2 hours 13 minutes (approximate).
- Use moist crumbs as the doneness cue; waiting for a completely dry tester can turn fudgy brownies cakey.
- Fold in 1/2 cup chopped walnuts after the flour for a crunchy version, noting the added tree nuts.
- Keep airtight at room temperature up to 3 days or refrigerate up to 5 days. Freeze wrapped squares for up to 2 months.
- Nutrition values are not provided; no calculated nutrition data is included.

Final Thoughts
Fudgy One-Bowl Brownies is a lovely excuse to slow down and make something sweet. Give the recipe its measuring, mixing, and resting time, then enjoy dense chocolate centers, a thin glossy top, and chewy edges. Keep the recipe card handy for your next batch, and choose a simple finish that lets the dessert itself shine.