Hi, I’m Sophie Bennett. I’m happy you’re here to make easy glazed yeast donuts with me. I love a dessert with a clear method and a little room for your own finishing touch. Today we’re aiming for light golden yeast donuts with a thin vanilla glaze, with each stage laid out so you can work at a comfortable pace.
This recipe makes 12 donuts plus holes. Read through the directions first, set out the heavy deep pot, thermometer, cutter, and cooling rack, and plan for the resting time before you begin. That small bit of preparation makes it easier to enjoy the process and serve the dessert at its best.
Why This Recipe Is Awesome
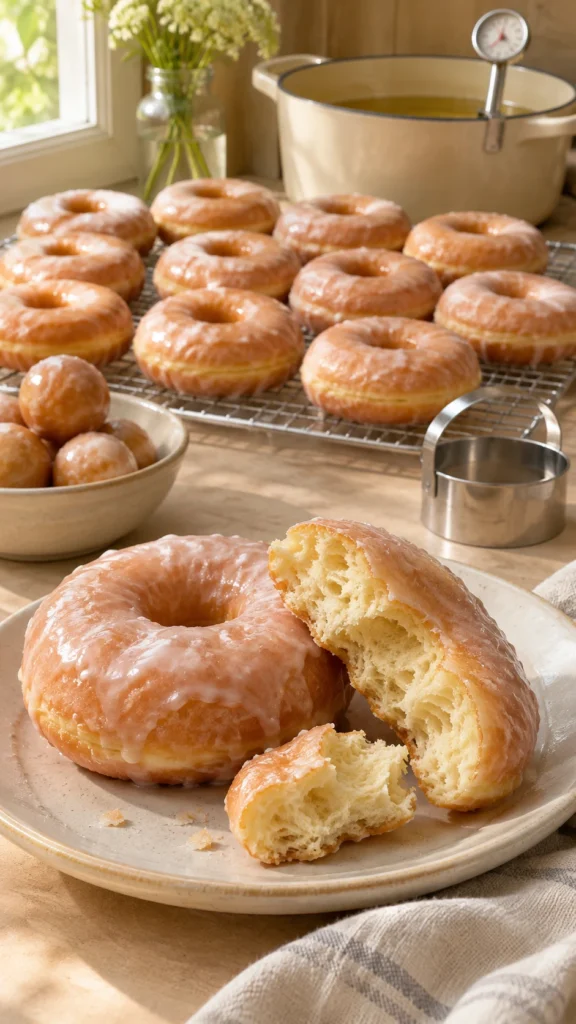
The appeal is light golden yeast donuts with a thin vanilla glaze. A soft yeast dough creates light rings before they meet the hot oil. Two rises matter as much as the frying stage, because the oil cannot fix dense unproofed dough. A thin vanilla glaze settles over the warm surface without covering the entire donut in a heavy icing layer.
Ingredients You’ll Need
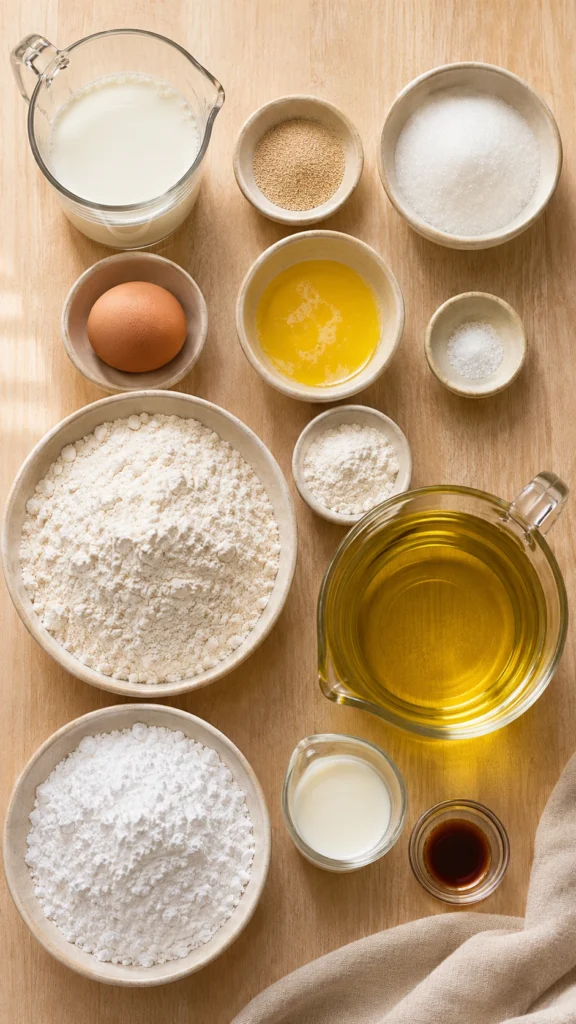
The recipe card gives the complete quantities for every component. These ingredient notes explain a few details that make the method easier to follow.
- Instant yeast leavens the dough over time. Keep the milk lukewarm and judge the rise by the visual cues as well as the clock.
- Flour supplies structure; spoon and level it, or use the gram weight so the mixture does not become unnecessarily dry.
- Butter contributes flavor and texture. Use it cold, softened, or melted exactly where specified; those states perform different jobs.
- Sugar controls sweetness and also affects tenderness. Keep the measured amount rather than making a large reduction on the first attempt.
Tools & Accessories for This Recipe
Choose equipment that suits the recipe size and your workspace. These basic tools help with measuring, mixing, and handling the finished dessert.
Affiliate links: qualifying purchases through these links may earn a commission.
- Heavy deep pot, thermometer, cutter, and cooling rack — the specified size and shape for this batch. Find on Amazon
- Digital Kitchen Scale — measuring flour for a soft balanced dough. Find on Amazon
- Mixing Bowl — providing room for the dough to expand during its rise. Find on Amazon
- Rolling Pin — shaping an even rectangle or sheet of dough. Find on Amazon
- Bench Scraper — moving and dividing dough without excessive extra flour. Find on Amazon
- Digital Food Thermometer — checking liquid or cooking temperature as the method requires. Find on Amazon
Step-by-Step Instructions
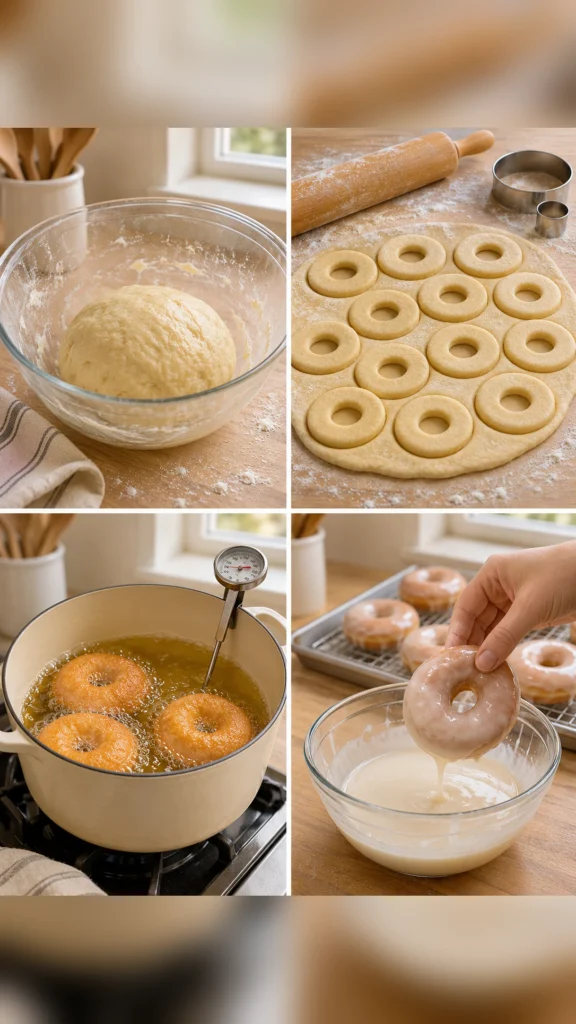
- Mix lukewarm milk, yeast, sugar, egg, and melted cooled butter. Add flour and salt, then knead 8–10 minutes until smooth and slightly tacky.
- Place in a lightly greased bowl, cover, and rise 60–90 minutes until roughly doubled. Prepare a tray with small parchment squares for shaped donuts.
- Roll dough to 1/2-inch thickness on a lightly floured surface. Cut twelve 3-inch rings with 1-inch centers, gently rerolling scraps once if needed.
- Transfer rings and holes to the tray, cover loosely, and rise 30–45 minutes until puffy. Avoid handling repeatedly during this second rise.
- Heat 2 inches of oil in a heavy pot to 350°F (175°C), leaving ample empty space above it. Use a thermometer and keep the pot stable.
- Fry two or three donuts at a time for 60–90 seconds per side, until golden. Slide off the paper before frying; maintain oil temperature and fry holes more briefly.
- Lift with a slotted utensil onto a rack over a sheet, then cool 5 minutes. Do not add wet utensils or water to hot oil.
- Whisk glaze ingredients until smooth and dip the warm donuts. Let excess drip onto the sheet and allow glaze to settle before serving. Cool the oil completely before handling it.
Common Mistakes to Avoid
- Keep oil close to 350°F; oil that is too cool makes greasy donuts, while excessive heat browns the outside before the center cooks.
- Adding too much extra flour makes a dry dough. Begin with the listed amount and add only enough for manageable handling.
- Judging a rise by the timer alone can be misleading. Look for the size and puffiness described in the method.
- Using very hot milk can damage yeast. Start with comfortably lukewarm liquid and allow melted butter to cool before mixing.
Alternatives & Substitutions
Add 1/4 teaspoon ground nutmeg to the dough for a classic warm-spice note.
Keep the dough balance intact when making a small flavor change. Large adjustments to flour, fat, liquid, or sugar alter kneading and rising, so they need more than a direct ingredient swap.
Storage and Serving
Enjoy the day they are fried. Refrigerate leftovers covered up to 2 days because of the milk glaze; texture becomes firmer with storage.
Ingredient check: this recipe includes wheat, milk, eggs. Review packaged ingredients for additional allergens and use clean equipment when preparing food for guests.
FAQ
Can I prepare this ahead?
Enjoy the day they are fried. Keep any finishing garnish separate when the method recommends adding it close to serving.
Which equipment size should I use?
Use the heavy deep pot, thermometer, cutter, and cooling rack specified for this batch. Changing the depth or portion size changes how quickly the center heats, chills, or freezes.
How can I tell if the oil is ready?
Use a frying thermometer to check for 350°F. Guessing from bubbles alone is unreliable; monitor the temperature between batches because adding dough temporarily cools the oil.
What flavor variation works here?
Add 1/4 teaspoon ground nutmeg to the dough for a classic warm-spice note. Keep the remaining quantities unchanged for this small variation.
How do I know it is ready?
Check the rise and cooking cues in the method. A golden surface alone does not establish that the center is cooked, especially in a large enriched loaf or a filled roll.
Can I make a larger batch?
Start with the quantities written for your first attempt. For more servings, separate batches or matching containers are easier to manage than making one much deeper layer and guessing the timing.
What should I check before beginning?
Read the method from start to finish, including the resting stages. Measure each component separately and prepare the pan or serving container before the mixture is ready to transfer.

Easy Glazed Yeast Donuts
Ingredients
Equipment
Method
- Mix lukewarm milk, yeast, sugar, egg, and melted cooled butter. Add flour and salt, then knead 8–10 minutes until smooth and slightly tacky.
- Place in a lightly greased bowl, cover, and rise 60–90 minutes until roughly doubled. Prepare a tray with small parchment squares for shaped donuts.
- Roll dough to 1/2-inch thickness on a lightly floured surface. Cut twelve 3-inch rings with 1-inch centers, gently rerolling scraps once if needed.
- Transfer rings and holes to the tray, cover loosely, and rise 30–45 minutes until puffy. Avoid handling repeatedly during this second rise.
- Heat 2 inches of oil in a heavy pot to 350°F (175°C), leaving ample empty space above it. Use a thermometer and keep the pot stable.
- Fry two or three donuts at a time for 60–90 seconds per side, until golden. Slide off the paper before frying; maintain oil temperature and fry holes more briefly.
- Lift with a slotted utensil onto a rack over a sheet, then cool 5 minutes. Do not add wet utensils or water to hot oil.
- Whisk glaze ingredients until smooth and dip the warm donuts. Let excess drip onto the sheet and allow glaze to settle before serving. Cool the oil completely before handling it.
Notes
- Yield: 12 donuts plus holes
- Oven/heat: Stovetop frying at 350°F (175°C)
- Pan/container: Heavy deep pot, thermometer, cutter, and cooling rack
- Approximate batch frying time. Rising and finishing rests are included separately; use a thermometer to monitor the oil.
- Times are approximate: cook/bake 20 minutes (approximate); cooling/chilling/resting 2 hours 15 minutes (approximate; see method); total 3 hours 15 minutes (approximate).
- Keep oil close to 350°F; oil that is too cool makes greasy donuts, while excessive heat browns the outside before the center cooks.
- Add 1/4 teaspoon ground nutmeg to the dough for a classic warm-spice note.
- Enjoy the day they are fried. Refrigerate leftovers covered up to 2 days because of the milk glaze; texture becomes firmer with storage.
- Nutrition values are not provided; no calculated nutrition data is included.
Final Thoughts
Easy Glazed Yeast Donuts is a lovely excuse to slow down and make something sweet. Give the recipe its measuring, mixing, and resting time, then enjoy light golden yeast donuts with a thin vanilla glaze. Keep the recipe card handy for your next batch, and choose a simple finish that lets the dessert itself shine.