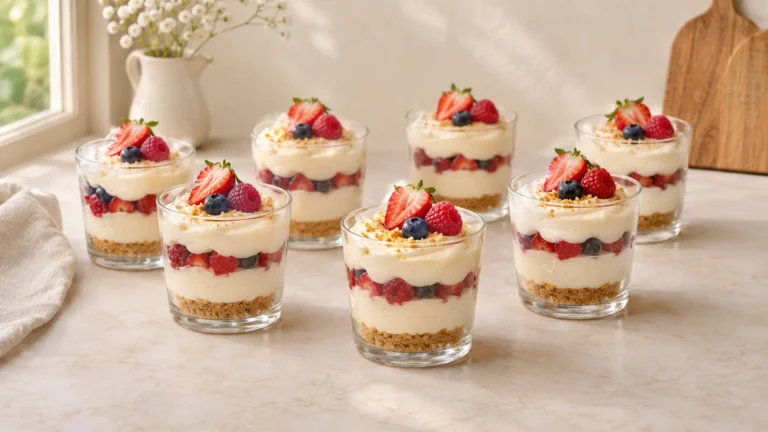
Hi, I’m Sophie Bennett. I’m happy you’re here to make no-bake strawberry cheesecake with me. I love a dessert with a clear method and a little room for your own finishing touch. Today we’re aiming for a light creamy vanilla filling, buttery cracker crust, and fresh strawberry topping, with each stage laid out so you can work at a comfortable pace.
This recipe makes 10 slices. Read through the directions first, set out the 9-inch springform pan, and plan for the resting time before you begin. That small bit of preparation makes it easier to enjoy the process and serve the dessert at its best.
Why This Recipe Is Awesome
The appeal is a light creamy vanilla filling, buttery cracker crust, and fresh strawberry topping. Whipped cream lightens the cream cheese base and helps it hold after a long chill. Fresh strawberries stay on top rather than adding extra water to the filling. That separation gives the cheesecake a clearer set and lets you refresh the fruit presentation just before serving.
Ingredients You’ll Need
The recipe card gives the complete quantities for every component. These ingredient notes explain a few details that make the method easier to follow.
- Block cream cheese creates a thicker filling than spreadable tub cheese. Soften it before mixing to avoid persistent little lumps.
- Strawberries should be ripe, dry, and free of damaged spots. Extra surface water can loosen a filling or soften a crust.
- Lemon juice brings acidity, while zest adds fragrance without much liquid. Keep the measured juice quantity consistent.
- Butter contributes flavor and texture. Use it cold, softened, or melted exactly where specified; those states perform different jobs.

Tools & Accessories for This Recipe
Choose equipment that suits the recipe size and your workspace. These basic tools help with measuring, mixing, and handling the finished dessert.
Affiliate links: qualifying purchases through these links may earn a commission.
- 9-inch springform pan — the specified size and shape for this batch. Find on Amazon
- Digital Kitchen Scale — measuring crust crumbs and filling ingredients precisely. Find on Amazon
- Electric Hand Mixer — smoothing softened cream cheese without leaving lumps. Find on Amazon
- Silicone Spatula — scraping the bottom of the bowl during mixing. Find on Amazon
- Mixing Bowls — preparing the crust and filling in separate stages. Find on Amazon
- Offset Spatula — leveling the filling and lifting small portions carefully. Find on Amazon
Step-by-Step Instructions
- Line the springform base with parchment. Mix graham crumbs and melted butter, then press firmly across the base and slightly up the sides.
- Refrigerate the crust for 30 minutes. Beat softened cream cheese and powdered sugar until completely smooth, scraping the sides and bottom.
- Mix vanilla and lemon juice into the cream cheese. In a separate cold bowl, whip heavy cream until stiff peaks hold without looking grainy.
- Fold one-third of the whipped cream into the cheese mixture to lighten it, then gently fold in the rest without deflating the cream.
- Spread filling into the chilled crust. Smooth the top, cover carefully, and refrigerate for at least 8 hours, preferably overnight.
- Shortly before serving, toss sliced strawberries with sugar and stand for 10 minutes. Drain excess juice so the topping does not flood the cheesecake.
- Run a thin knife around the inside of the ring and release the pan carefully. Spoon berries onto the top just before slicing.
- Cut with a warm wiped knife and use a wide server. Keep remaining cheesecake cold because its structure softens at room temperature.
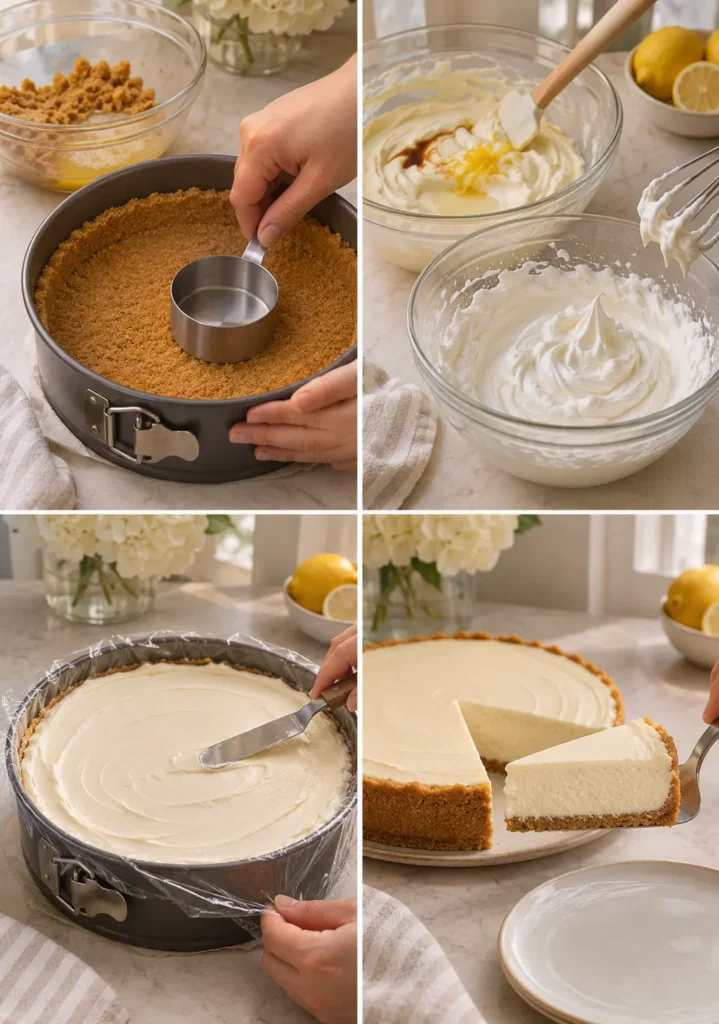
Choose a level refrigerator shelf before starting. A tilted pan can leave one side deeper than the other, and a crowded shelf makes it harder to cover the dessert without touching its surface.
Common Mistakes to Avoid
- Keep strawberries out of the filling in this formula; extra fruit puree can prevent a clean set without additional stabilizers.
- Cold cream cheese can leave lumps that survive mixing. Soften it first, and scrape the bowl before adding the remaining filling ingredients.
- Overmixing can introduce more air than the filling needs. Use low speed for blending and fold whipped cream gently when included.
- Serving before chilling can leave the center too soft. Plan the refrigerator time before beginning rather than trying to rush the set.
Alternatives & Substitutions
Replace the strawberry topping with sliced peaches, draining released juice before spooning over the cake.
Keep the main structure of the recipe intact when making this variation. Replacing flour, fat, eggs, or dairy can require a different formula rather than a direct swap.
Storage and Serving
Refrigerate covered up to 3 days. Freeze without the fresh fruit topping up to 1 month; thaw in the refrigerator and add berries before serving.
Ingredient check: this recipe includes wheat, milk. Review packaged ingredients for additional allergens and use clean equipment when preparing food for guests.
Add fresh fruit or a sauce close to serving when possible. Moist toppings can release juice during storage and gradually soften the crust, even when the filling itself remains well chilled.
FAQ
Can I make this ahead?
Refrigerate covered up to 3 days. Prepare any fresh garnish close to serving so it keeps its color and texture.
Which pan or container should I use?
Use the 9-inch springform pan as written. The depth controls how the mixture sets, so changing the dimensions means you also need to reassess the timing.
What is the most important texture tip?
Keep strawberries out of the filling in this formula; extra fruit puree can prevent a clean set without additional stabilizers.
Can I change the flavor?
Replace the strawberry topping with sliced peaches, draining released juice before spooning over the cake. Make one small change at a time so it is easier to judge the result.
How do I know it is ready to serve?
Follow the full chilling period. The cold filling should hold its intended shape; cups remain spoonable, while whole cheesecakes need enough firmness to slice cleanly.
Can I halve or double the recipe?
For a first batch, use the quantities and pan listed. Scaling changes thickness, mixing, and timing; multiplying ingredients alone does not establish a new baking time.
Can I stir strawberry puree into the filling?
Keep the fruit on top for this version. Puree introduces extra moisture, and this gelatin-free formula is not designed around that added liquid.

No-Bake Strawberry Cheesecake
Ingredients
Equipment
Method
- Line the springform base with parchment. Mix graham crumbs and melted butter, then press firmly across the base and slightly up the sides.
- Refrigerate the crust for 30 minutes. Beat softened cream cheese and powdered sugar until completely smooth, scraping the sides and bottom.
- Mix vanilla and lemon juice into the cream cheese. In a separate cold bowl, whip heavy cream until stiff peaks hold without looking grainy.
- Fold one-third of the whipped cream into the cheese mixture to lighten it, then gently fold in the rest without deflating the cream.
- Spread filling into the chilled crust. Smooth the top, cover carefully, and refrigerate for at least 8 hours, preferably overnight.
- Shortly before serving, toss sliced strawberries with sugar and stand for 10 minutes. Drain excess juice so the topping does not flood the cheesecake.
- Run a thin knife around the inside of the ring and release the pan carefully. Spoon berries onto the top just before slicing.
- Cut with a warm wiped knife and use a wide server. Keep remaining cheesecake cold because its structure softens at room temperature.
Notes
- Yield: 10 slices
- Oven/heat: No oven needed
- Pan/container: 9-inch springform pan
- No cooking required.
- Times are approximate: cook/bake 0 minutes (approximate); cooling/chilling/resting 8 hours 30 minutes (approximate; see method); total 9 hours (approximate).
- Keep strawberries out of the filling in this formula; extra fruit puree can prevent a clean set without additional stabilizers.
- Replace the strawberry topping with sliced peaches, draining released juice before spooning over the cake.
- Refrigerate covered up to 3 days. Freeze without the fresh fruit topping up to 1 month; thaw in the refrigerator and add berries before serving.
- Nutrition values are not provided; no calculated nutrition data is included.

Final Thoughts
No-Bake Strawberry Cheesecake is a lovely excuse to slow down and make something sweet. Give the recipe its measuring, mixing, and resting time, then enjoy a light creamy vanilla filling, buttery cracker crust, and fresh strawberry topping. Keep the recipe card handy for your next batch, and choose a simple finish that lets the dessert itself shine.