Hi, I’m Sophie Bennett. I’m happy you’re here to make homemade ice cream cake with me. I love a dessert with a clear method and a little room for your own finishing touch. Today we’re aiming for contrasting vanilla and chocolate ice cream layers with a cookie crunch and whipped topping, with each stage laid out so you can work at a comfortable pace.
This recipe makes 12 slices. Read through the directions first, set out the 9-inch springform pan, and plan for the resting time before you begin. That small bit of preparation makes it easier to enjoy the process and serve the dessert at its best.
Why This Recipe Is Awesome
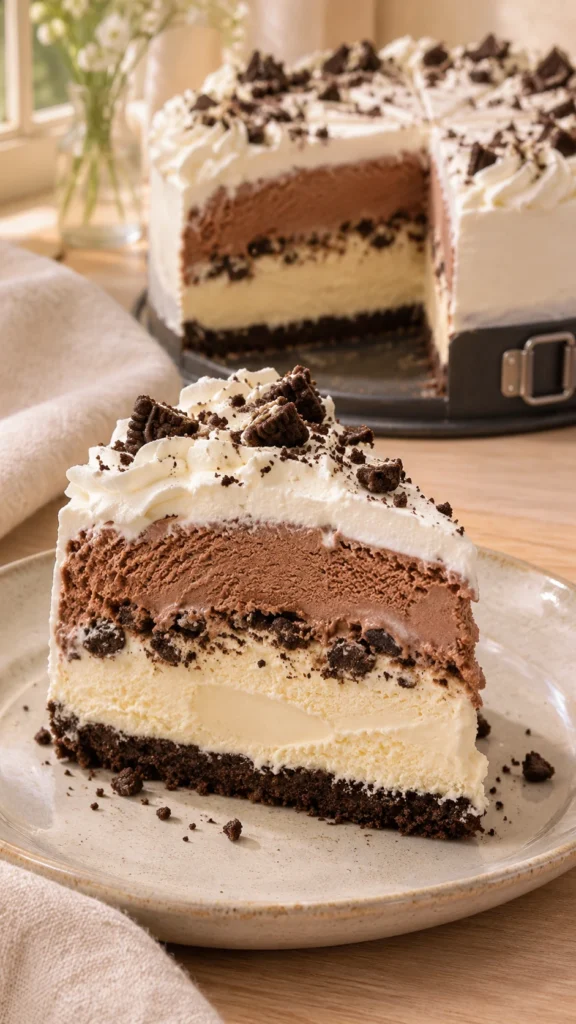
The appeal is contrasting vanilla and chocolate ice cream layers with a cookie crunch and whipped topping. Firming one layer before adding another keeps the vanilla and chocolate sections visibly separate. Cookie crumbs and thick fudge provide contrast without requiring a baked sponge. A whipped cream coating finishes the cake quickly, and a final freeze makes it easier to slice neatly.
Ingredients You’ll Need
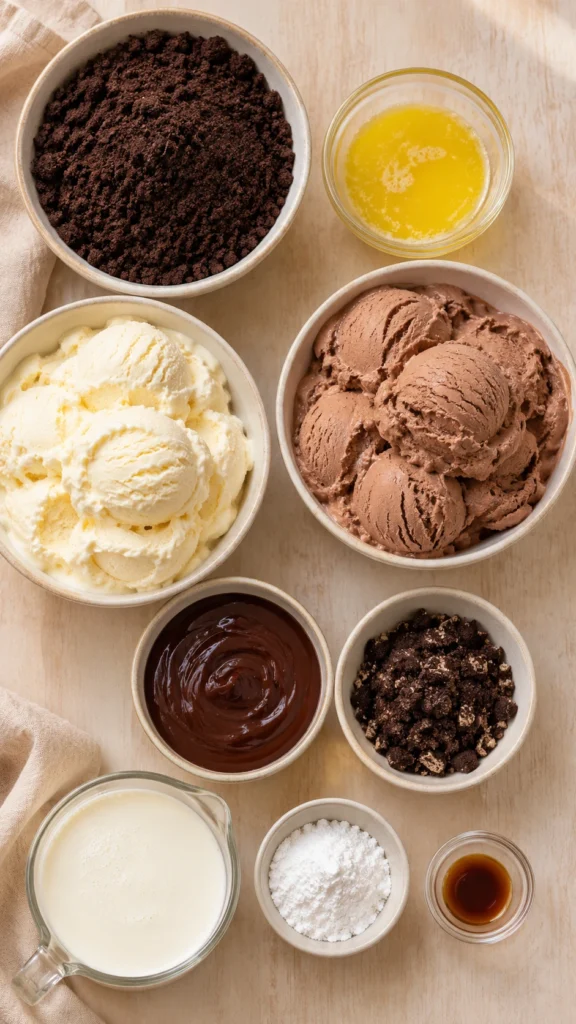
The recipe card gives the complete quantities for every component. These ingredient notes explain a few details that make the method easier to follow.
- Chocolate supplies both flavor and body. If melting it, use gentle heat and keep stray water out of the bowl.
- Butter contributes flavor and texture. Use it cold, softened, or melted exactly where specified; those states perform different jobs.
- Sugar controls sweetness and also affects tenderness. Keep the measured amount rather than making a large reduction on the first attempt.
- Heavy cream contributes richness and, when whipped, structure. Keep whipping cream cold and stop before it becomes grainy.
Use the named dairy or fruit form rather than making a large water-content change. Condensed milk, heavy cream, whole-milk yogurt, and fruit puree behave differently once frozen, even when they look similar in the mixing bowl.
Tools & Accessories for This Recipe
Choose equipment that suits the recipe size and your workspace. These basic tools help with measuring, mixing, and handling the finished dessert.
Affiliate links: qualifying purchases through these links may earn a commission.
- 9-inch springform pan — the specified size and shape for this batch. Find on Amazon
- Digital Kitchen Scale — measuring the fruit and sweetener consistently. Find on Amazon
- Mixing Bowls — keeping the dessert components organized before freezing. Find on Amazon
- Silicone Spatula — scraping the bowl without leaving dense mixture behind. Find on Amazon
- Freezer Safe Containers — covering portions tightly during frozen storage. Find on Amazon
- Digital Kitchen Timer — tracking each chilling and freezing stage. Find on Amazon
Step-by-Step Instructions
- Line the springform base with parchment. Combine crust crumbs and melted butter, press firmly across the base, and freeze for 20 minutes.
- Let vanilla ice cream soften just until spreadable, not melted. Spread over the frozen crust in an even layer and freeze for 1 hour.
- Spread cold thick fudge sauce over the firm vanilla layer. Scatter crushed cookies over the sauce, leaving the outer edge reasonably clear.
- Soften chocolate ice cream slightly and spread carefully over the cookie layer. Press gently to remove large gaps without melting the layer below.
- Cover tightly and freeze at least 6 hours until solid. Keep the pan level so the layered cross-section is even.
- Whip heavy cream, powdered sugar, and vanilla to stiff peaks. Release the frozen cake from the ring, supporting the base securely.
- Spread whipped cream over the top and sides, working quickly. Freeze another 30–60 minutes to set the coating before cutting.
- Let stand 5–10 minutes, then slice with a warm dry knife, wiping between cuts. Return remaining cake to the freezer promptly after serving.
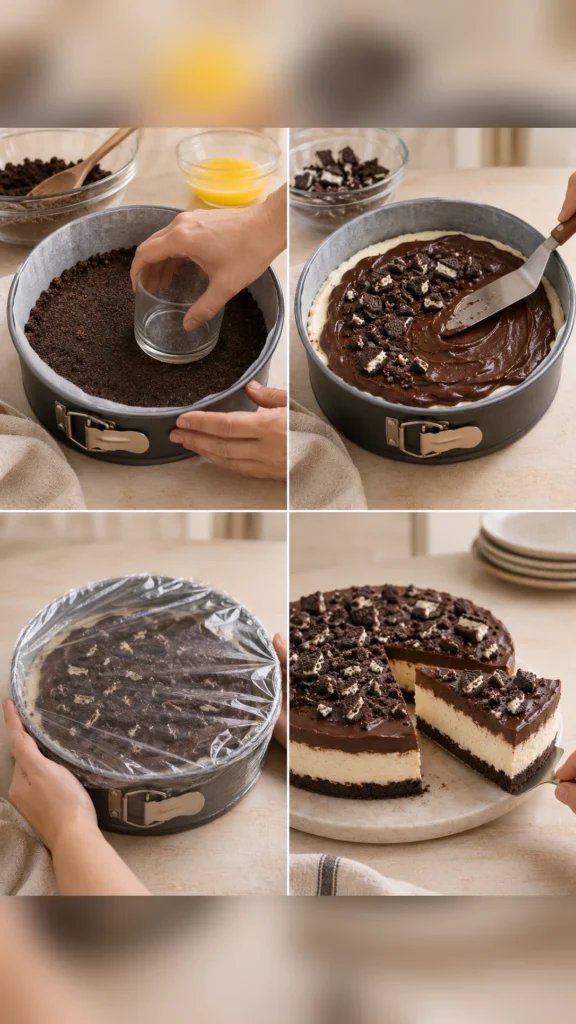
Check the storage container before beginning. It should be freezer-safe, clean, dry, and large enough for the batch with a little headroom; a loose cover exposes the surface to freezer odors and ice crystals.
Common Mistakes to Avoid
- Freeze each layer before adding the next; spreading soft ice cream onto another soft layer can blur the colors and force filling outward.
- Starting without freezer space makes assembly awkward. Clear a level shelf and chill the storage container when directed.
- Reducing sugar substantially changes frozen texture. Keep the written balance for the first batch rather than adjusting only for sweetness.
- Letting the whole container melt between servings encourages ice crystals. Soften briefly and return the unused portion to the freezer promptly.
Alternatives & Substitutions
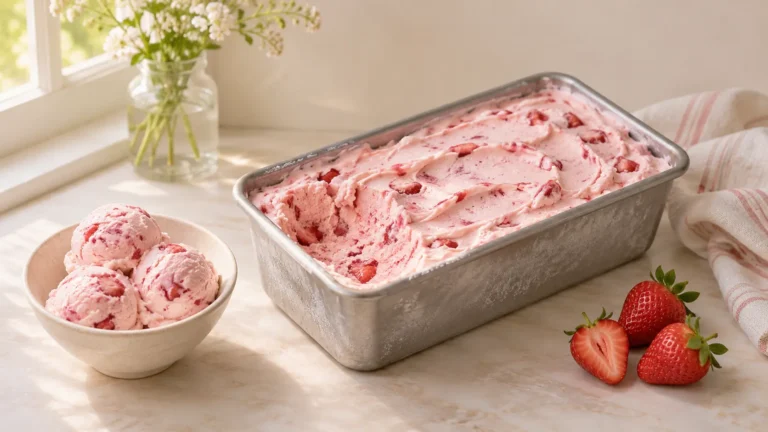
Use strawberry ice cream instead of chocolate for a strawberry-vanilla version with the same layer quantities.
Keep the frozen base balanced when trying this variation. Large changes to sugar, water, or dairy alter firmness and ice-crystal formation; changing a flavor is simpler than rebuilding the freezing formula.
Storage and Serving
Freeze tightly covered up to 1 week for the best texture. Wrap individual leftover slices to reduce freezer odors and ice crystals.
Ingredient check: this recipe includes wheat, milk. Review packaged ingredients for additional allergens and use clean equipment when preparing food for guests.
FAQ
Can I prepare this ahead?
Freeze tightly covered up to 1 week for the best texture. Keep any finishing garnish separate when the method recommends adding it close to serving.
Which equipment size should I use?
Use the 9-inch springform pan specified for this batch. Changing the depth or portion size changes how quickly the center heats, chills, or freezes.
Can I make the fudge layer warm?
Keep it cold and thick but spreadable. Warm sauce melts the vanilla layer beneath it, which can make the filling run toward the edges and blur the layered shape.
What flavor variation works here?
Use strawberry ice cream instead of chocolate for a strawberry-vanilla version with the same layer quantities. Keep the remaining quantities unchanged for this small variation.
How do I know it is ready?
Follow the full freezing period and check the center, not only the firm outer edge. Churned desserts begin soft and need their separate hardening stage before they hold a scoop.
Can I make a larger batch?
Start with the quantities written for your first attempt. For more servings, separate batches or matching containers are easier to manage than making one much deeper layer and guessing the timing.
What should I check before beginning?
Read the method from start to finish, including the resting stages. Measure each component separately and prepare the pan or serving container before the mixture is ready to transfer.

Homemade Ice Cream Cake
Ingredients
Equipment
Method
- Line the springform base with parchment. Combine crust crumbs and melted butter, press firmly across the base, and freeze for 20 minutes.
- Let vanilla ice cream soften just until spreadable, not melted. Spread over the frozen crust in an even layer and freeze for 1 hour.
- Spread cold thick fudge sauce over the firm vanilla layer. Scatter crushed cookies over the sauce, leaving the outer edge reasonably clear.
- Soften chocolate ice cream slightly and spread carefully over the cookie layer. Press gently to remove large gaps without melting the layer below.
- Cover tightly and freeze at least 6 hours until solid. Keep the pan level so the layered cross-section is even.
- Whip heavy cream, powdered sugar, and vanilla to stiff peaks. Release the frozen cake from the ring, supporting the base securely.
- Spread whipped cream over the top and sides, working quickly. Freeze another 30–60 minutes to set the coating before cutting.
- Let stand 5–10 minutes, then slice with a warm dry knife, wiping between cuts. Return remaining cake to the freezer promptly after serving.
Notes
- Yield: 12 slices
- Oven/heat: Freezer only
- Pan/container: 9-inch springform pan
- Cooking time excludes chilling, churning, and freezing. Prepare an ice cream maker in advance only when the method requires one; manufacturer bowl-freezing time is additional.
- Times are approximate: cook/bake 0 minutes (approximate); cooling/chilling/resting 8 hours 5 minutes (approximate; see method); total 8 hours 40 minutes (approximate).
- Freeze each layer before adding the next; spreading soft ice cream onto another soft layer can blur the colors and force filling outward.
- Use strawberry ice cream instead of chocolate for a strawberry-vanilla version with the same layer quantities.
- Freeze tightly covered up to 1 week for the best texture. Wrap individual leftover slices to reduce freezer odors and ice crystals.
- Nutrition values are not provided; no calculated nutrition data is included.
Final Thoughts
Homemade Ice Cream Cake is a lovely excuse to slow down and make something sweet. Give the recipe its measuring, mixing, and resting time, then enjoy contrasting vanilla and chocolate ice cream layers with a cookie crunch and whipped topping. Keep the recipe card handy for your next batch, and choose a simple finish that lets the dessert itself shine.