Hi, I’m Sophie Bennett. I’m happy you’re here to make homemade vanilla ice cream with me. I love a dessert with a clear method and a little room for your own finishing touch. Today we’re aiming for a smooth custard-based vanilla ice cream with a rich, scoopable finish, with each stage laid out so you can work at a comfortable pace.
This recipe makes about 1 1/4 quarts, 10 servings. Read through the directions first, set out the ice cream maker and freezer-safe 1 1/2-quart container, and plan for the resting time before you begin. That small bit of preparation makes it easier to enjoy the process and serve the dessert at its best.
Why This Recipe Is Awesome
The appeal is a smooth custard-based vanilla ice cream with a rich, scoopable finish. An egg-yolk custard gives this vanilla ice cream richness and a smooth body. Chilling the base before churning lets the machine concentrate on freezing rather than cooling warm dairy. A final freezer rest changes the soft churned mixture into scoopable portions.
Ingredients You’ll Need
The recipe card gives the complete quantities for every component. These ingredient notes explain a few details that make the method easier to follow.
- Sugar controls sweetness and also affects tenderness. Keep the measured amount rather than making a large reduction on the first attempt.
- Heavy cream contributes richness and, when whipped, structure. Keep whipping cream cold and stop before it becomes grainy.
- Eggs help bind and set the mixture. Use large eggs and keep any extra yolks separate from whole-egg quantities.
- Vanilla rounds out the flavor. Measure rather than pouring freely, especially when the batch is small.

Tools & Accessories for This Recipe
Choose equipment that suits the recipe size and your workspace. These basic tools help with measuring, mixing, and handling the finished dessert.
Affiliate links: qualifying purchases through these links may earn a commission.
- Ice cream maker and freezer-safe 1 1/2-quart container — the specified size and shape for this batch. Find on Amazon
- Digital Kitchen Scale — measuring the fruit and sweetener consistently. Find on Amazon
- Mixing Bowls — keeping the dessert components organized before freezing. Find on Amazon
- Silicone Spatula — scraping the bowl without leaving dense mixture behind. Find on Amazon
- Freezer Safe Containers — covering portions tightly during frozen storage. Find on Amazon
- Digital Kitchen Timer — tracking each chilling and freezing stage. Find on Amazon
Step-by-Step Instructions
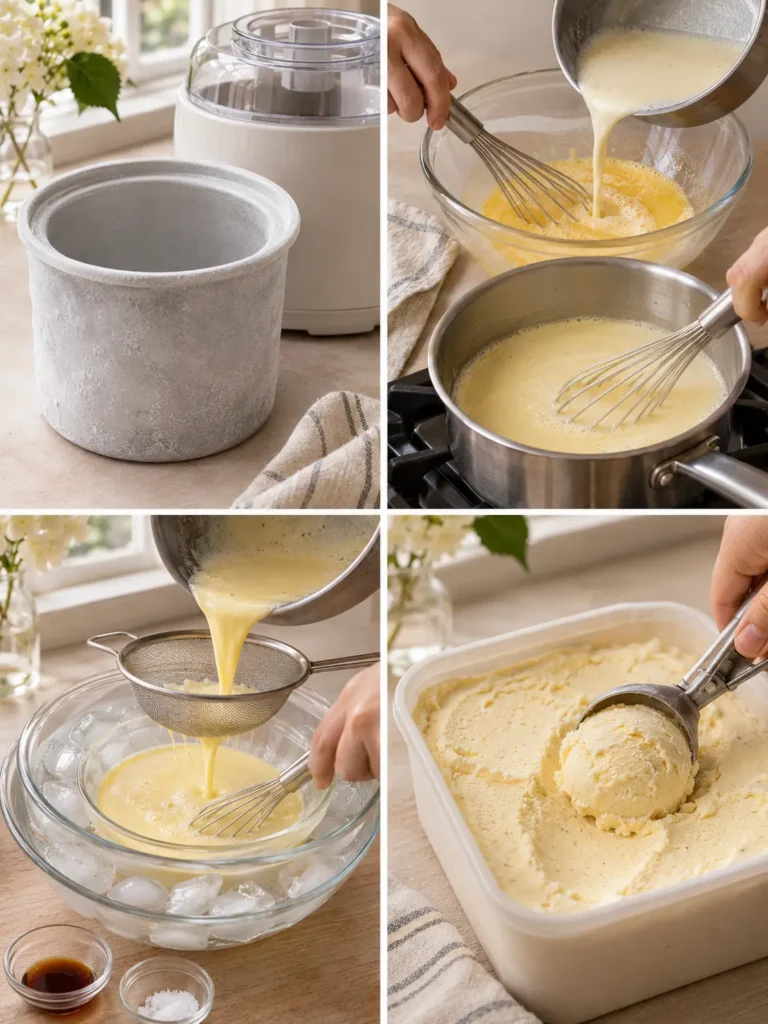
- Prepare the ice cream maker according to its instructions. If it uses a freezer bowl, freeze that bowl for the full manufacturer-specified time before beginning.
- Warm milk, cream, and half the sugar in a saucepan until steaming. Whisk egg yolks with the remaining sugar in a separate heatproof bowl.
- Slowly whisk about 1 cup of warm dairy into the yolks. Pour this tempered mixture back into the saucepan while stirring continuously.
- Cook over medium-low heat, stirring along the base, until the custard coats a spoon and reaches 170°F (77°C). Do not boil.
- Strain into a clean bowl and stir in vanilla and salt. Cool over an ice-water bath, stirring, then refrigerate covered at least 4 hours until thoroughly cold.
- Churn in the prepared machine according to its instructions, usually 20–30 minutes, until the mixture resembles thick soft-serve ice cream.
- Transfer to a chilled freezer-safe container. Press food-safe wrapping onto the surface, cover, and freeze at least 6 hours to firm.
- Let stand at room temperature for 5–10 minutes before scooping. Return the container to the freezer promptly rather than allowing it to melt between servings.
Check the storage container before beginning. It should be freezer-safe, clean, dry, and large enough for the batch with a little headroom; a loose cover exposes the surface to freezer odors and ice crystals.
Common Mistakes to Avoid
- Chill the cooked base completely before churning; a warm base cannot freeze efficiently in a home machine.
- Starting without freezer space makes assembly awkward. Clear a level shelf and chill the storage container when directed.
- Reducing sugar substantially changes frozen texture. Keep the written balance for the first batch rather than adjusting only for sweetness.
- Letting the whole container melt between servings encourages ice crystals. Soften briefly and return the unused portion to the freezer promptly.
Alternatives & Substitutions
Fold 1/2 cup chopped chocolate into the churned ice cream just before transferring it to the freezer.
Keep the frozen base balanced when trying this variation. Large changes to sugar, water, or dairy alter firmness and ice-crystal formation; changing a flavor is simpler than rebuilding the freezing formula.
Storage and Serving
Keep tightly covered in the freezer for up to 2 weeks for the best texture. Avoid repeated melting and refreezing, which encourages ice crystals.
Ingredient check: this recipe includes milk, eggs. Review packaged ingredients for additional allergens and use clean equipment when preparing food for guests.
FAQ
Can I prepare this ahead?
Keep tightly covered in the freezer for up to 2 weeks for the best texture. Keep any finishing garnish separate when the method recommends adding it close to serving.
Which equipment size should I use?
Use the ice cream maker and freezer-safe 1 1/2-quart container specified for this batch. Changing the depth or portion size changes how quickly the center heats, chills, or freezes.
How early should I freeze the machine bowl?
Follow the specific machine instructions; many freezer bowls need at least a full day. The recipe timing assumes your machine is already prepared and does not include that separate equipment preparation.
What flavor variation works here?
Fold 1/2 cup chopped chocolate into the churned ice cream just before transferring it to the freezer. Keep the remaining quantities unchanged for this small variation.
How do I know it is ready?
Follow the full freezing period and check the center, not only the firm outer edge. Churned desserts begin soft and need their separate hardening stage before they hold a scoop.
Can I make a larger batch?
Start with the quantities written for your first attempt. For more servings, separate batches or matching containers are easier to manage than making one much deeper layer and guessing the timing.
What should I check before beginning?
Read the method from start to finish, including the resting stages. Measure each component separately and prepare the pan or serving container before the mixture is ready to transfer.
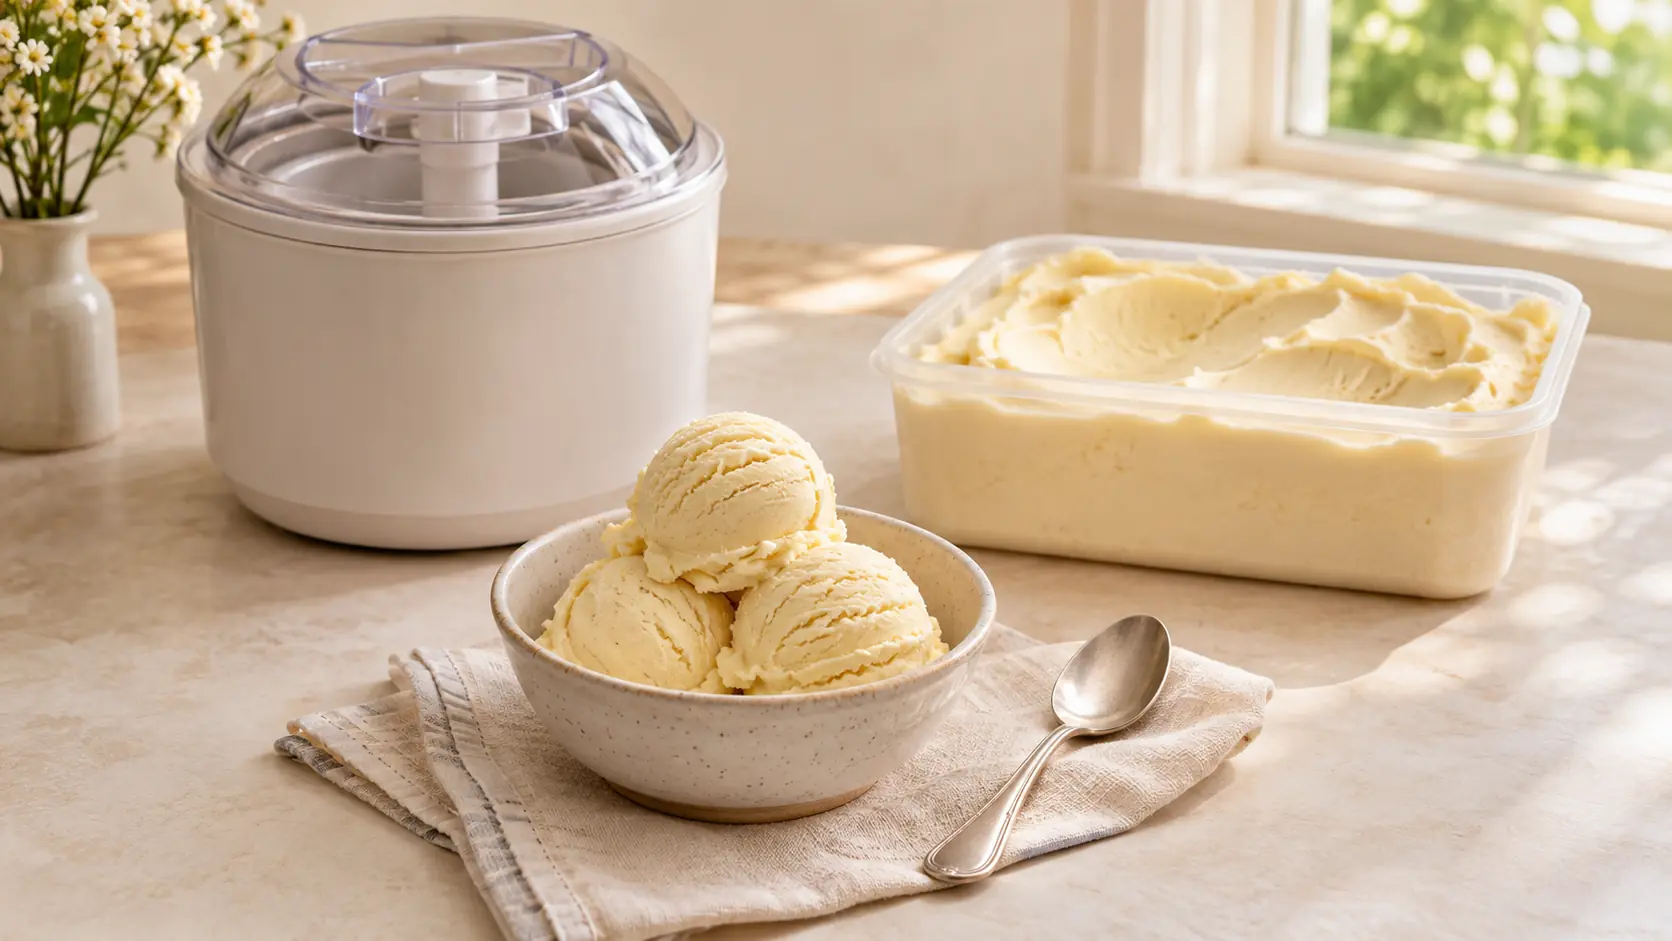
Homemade Vanilla Ice Cream
Ingredients
Equipment
Method
- Prepare the ice cream maker according to its instructions. If it uses a freezer bowl, freeze that bowl for the full manufacturer-specified time before beginning.
- Warm milk, cream, and half the sugar in a saucepan until steaming. Whisk egg yolks with the remaining sugar in a separate heatproof bowl.
- Slowly whisk about 1 cup of warm dairy into the yolks. Pour this tempered mixture back into the saucepan while stirring continuously.
- Cook over medium-low heat, stirring along the base, until the custard coats a spoon and reaches 170°F (77°C). Do not boil.
- Strain into a clean bowl and stir in vanilla and salt. Cool over an ice-water bath, stirring, then refrigerate covered at least 4 hours until thoroughly cold.
- Churn in the prepared machine according to its instructions, usually 20–30 minutes, until the mixture resembles thick soft-serve ice cream.
- Transfer to a chilled freezer-safe container. Press food-safe wrapping onto the surface, cover, and freeze at least 6 hours to firm.
- Let stand at room temperature for 5–10 minutes before scooping. Return the container to the freezer promptly rather than allowing it to melt between servings.
Notes
- Yield: About 1 1/4 quarts, 10 servings
- Oven/heat: Stovetop, ice cream maker, and freezer
- Pan/container: Ice cream maker and freezer-safe 1 1/2-quart container
- Cooking time excludes chilling, churning, and freezing. Prepare an ice cream maker in advance only when the method requires one; manufacturer bowl-freezing time is additional.
- Times are approximate: cook/bake 10 minutes (approximate); cooling/chilling/resting 11 hours (approximate; see method); total 11 hours 30 minutes (approximate).
- Chill the cooked base completely before churning; a warm base cannot freeze efficiently in a home machine.
- Fold 1/2 cup chopped chocolate into the churned ice cream just before transferring it to the freezer.
- Keep tightly covered in the freezer for up to 2 weeks for the best texture. Avoid repeated melting and refreezing, which encourages ice crystals.
- Nutrition values are not provided; no calculated nutrition data is included.

Final Thoughts
Homemade Vanilla Ice Cream is a lovely excuse to slow down and make something sweet. Give the recipe its measuring, mixing, and resting time, then enjoy a smooth custard-based vanilla ice cream with a rich, scoopable finish. Keep the recipe card handy for your next batch, and choose a simple finish that lets the dessert itself shine.